
All About Tiles
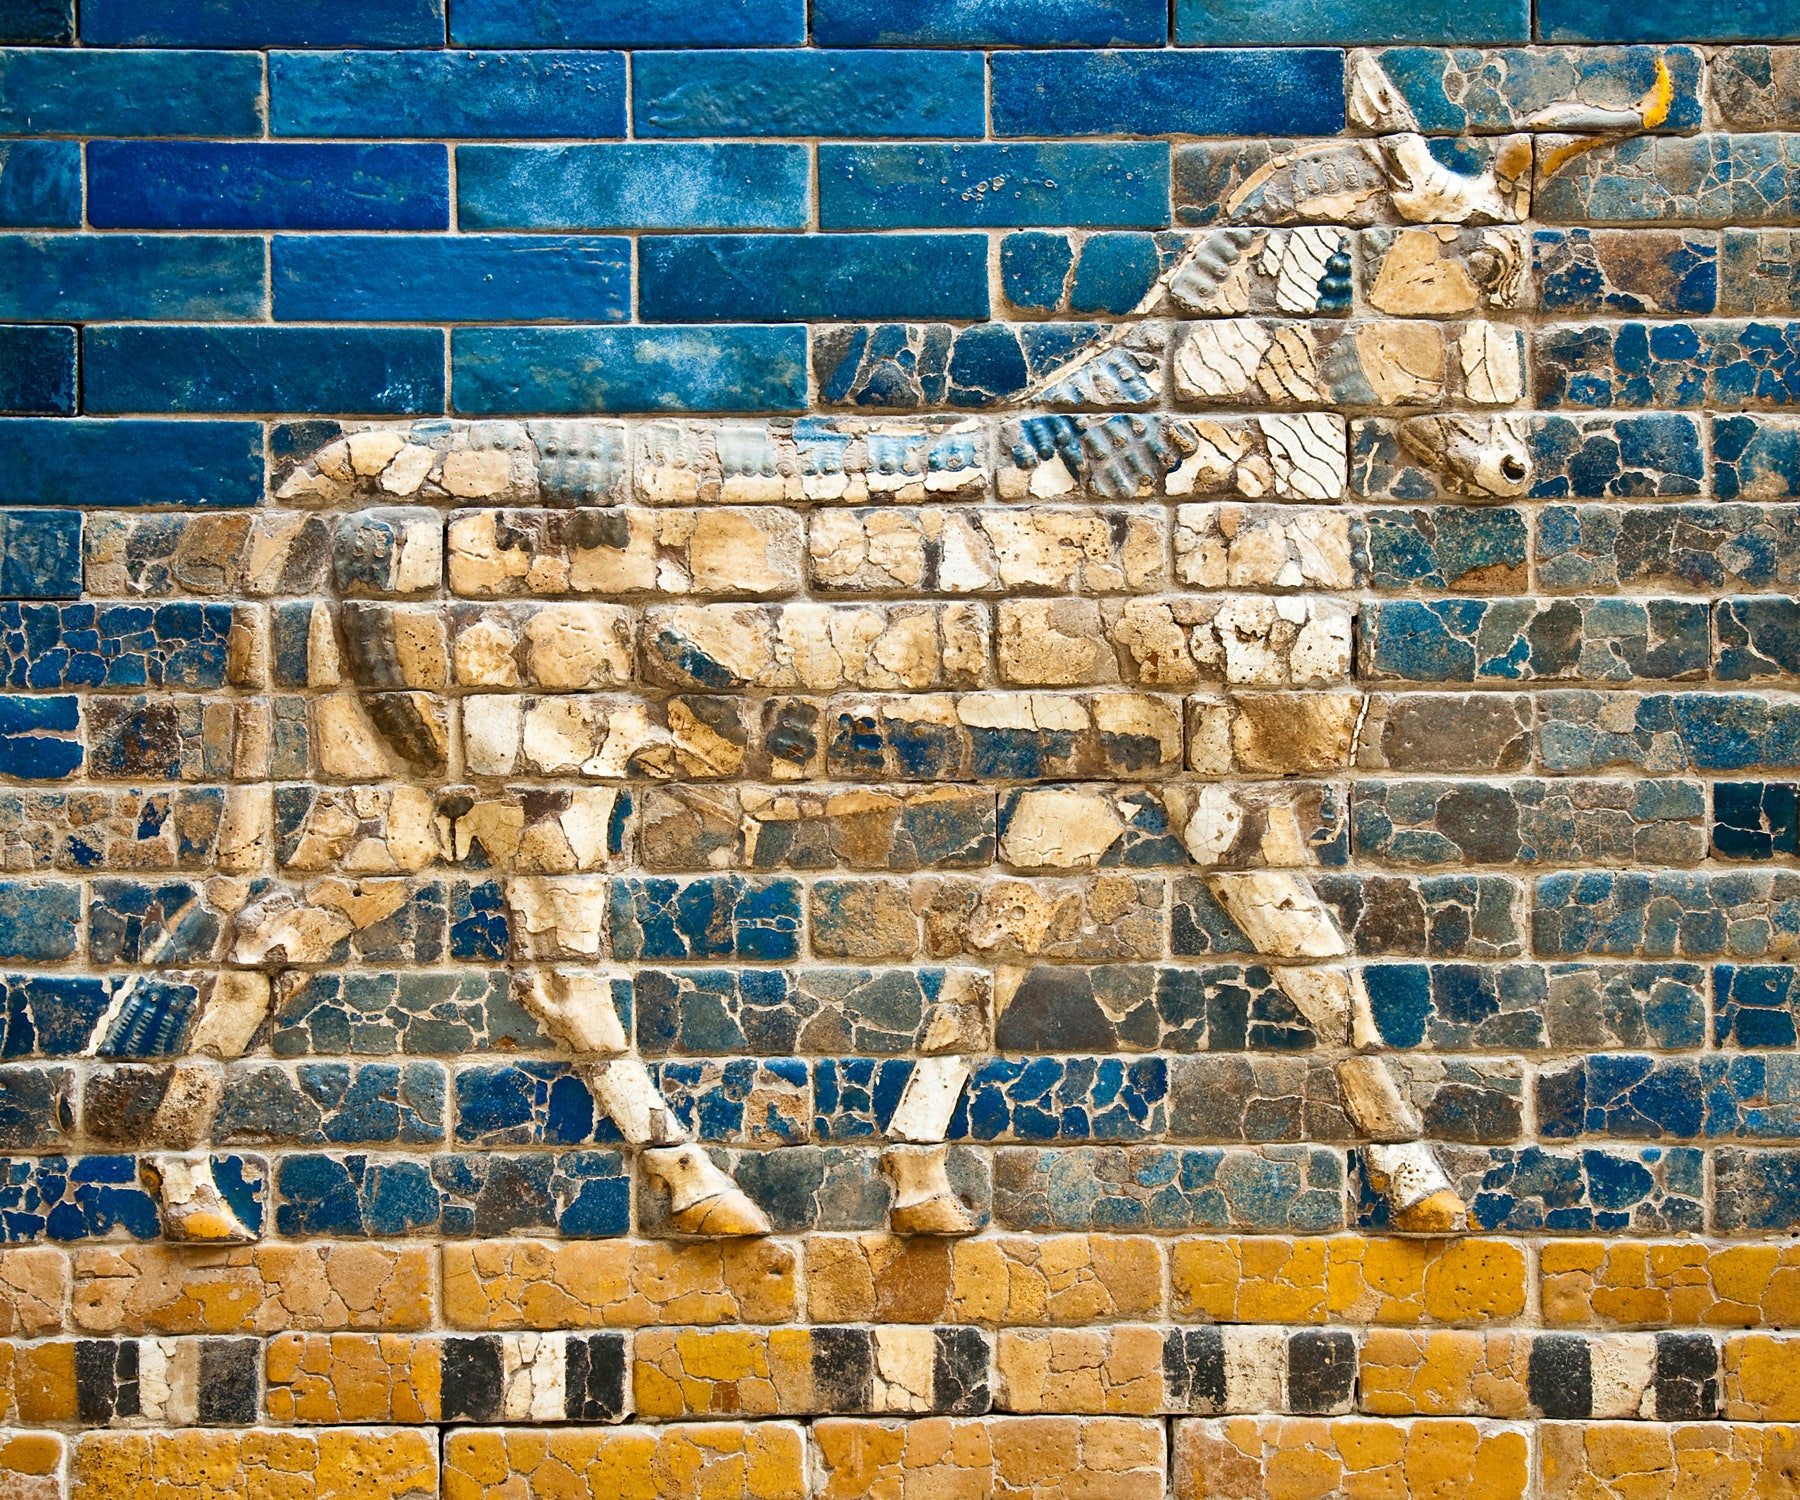
First Tiles Date Back 2600 BC!
Tiles are categorised technically by how they are made. The two main methods of making tiles are by pressing clay powder or extruding wet clay. To find out the nitty-gritty of how tiles are made, read on!
How Tiles Are Made
The production of wall and floor tiles dates back to ancient times and peoples, including the Egyptians, the Babylonians and the Assyrians. The Step Pyramid for the Pharaoh Djoser in ancient Egypt, dated around 2600 B.C. contained colourful glazed tiles. Today, tiles are manufactured on a large, industrial-scale all around the world with a high degree of automation and endless design and size outcomes.
All ceramic tiles are made from a mixture of different clays and minerals. Porcelain tiles are a type of ceramic tile made from a slightly different mixture and fired to a higher temperature. They are made by the same production methods but in the case of unglazed porcelain, will miss the glazing stage. Unglazed porcelain can also be polished after firing and both glazed and unglazed porcelain can be rectified, which means trimmed to a consistent size.
Modern tile factories produce no industrial waste that isn’t reused in the manufacturing process. Water from glazing lines is fed back to the clay preparation area for inclusion into the clay slip mixture. Pressed and glazed tile waste is also fed back into the tile body formulation. The heat from kilns is used in driers and in cogeneration of electricity.
In fact one of our suppliers, Florim is Certified B Corp, which is only provided after a long and detailed verification process and is considered among the highest social and environmental performance standards.
Beaumont Tiles, along with the industry as a whole is highly engaged with sustainability conscientiousness and work continues in that area.
Featured Tiles
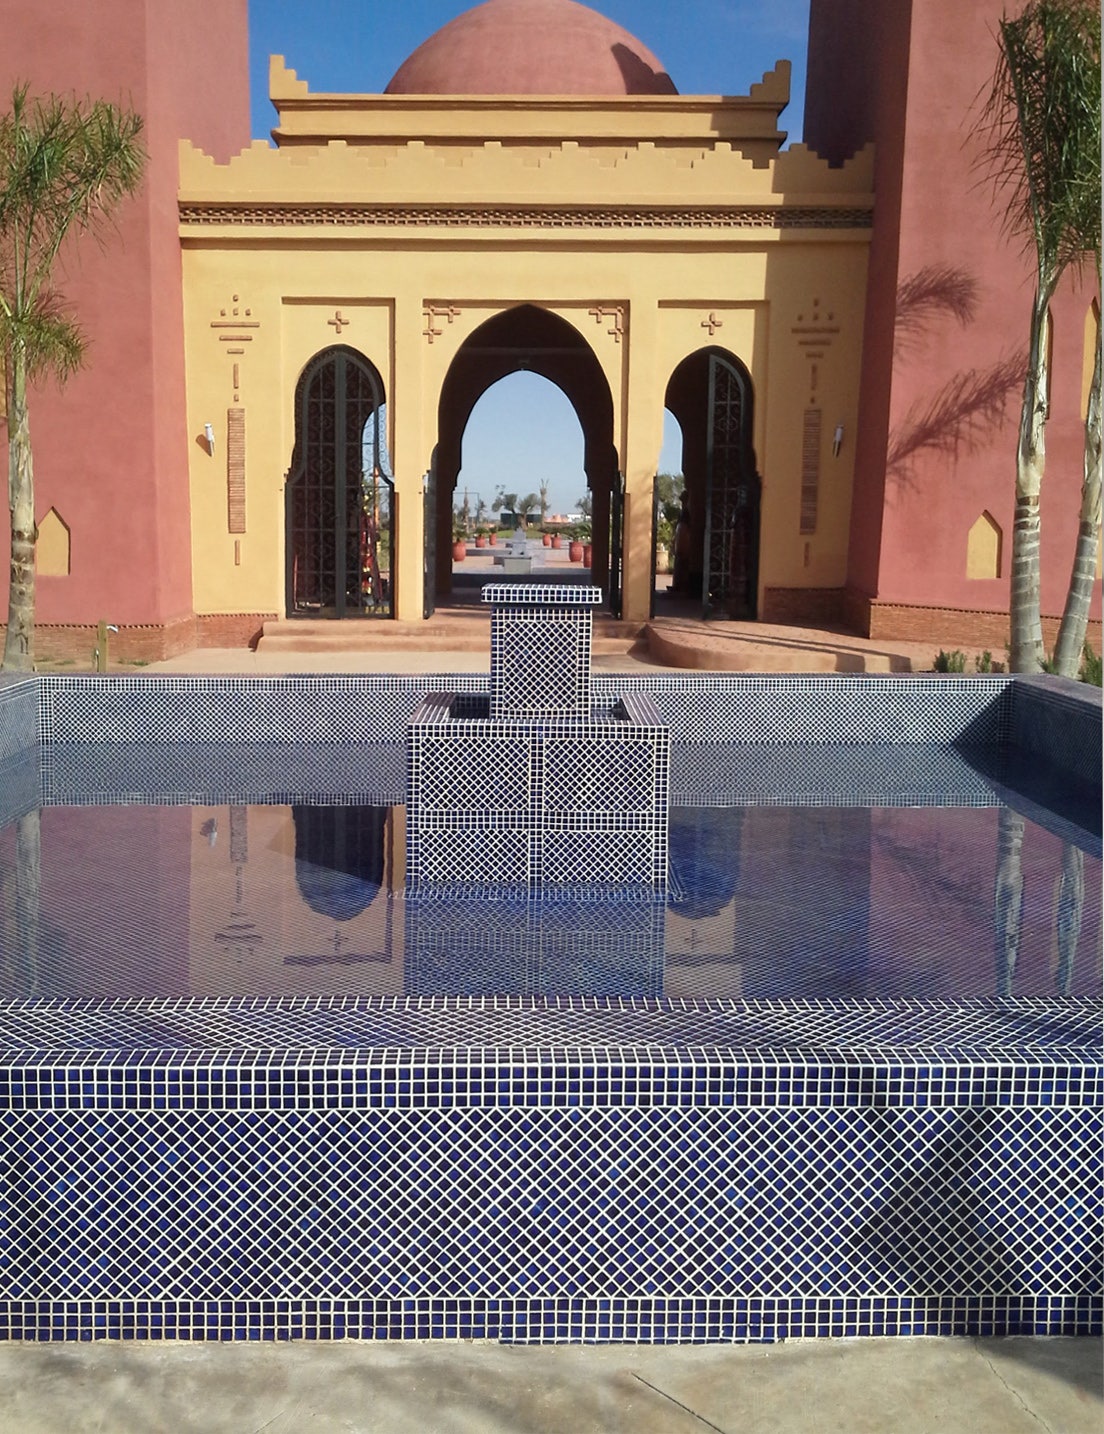
Pool Tile: Mosaic Glass Niebla Dark Blue
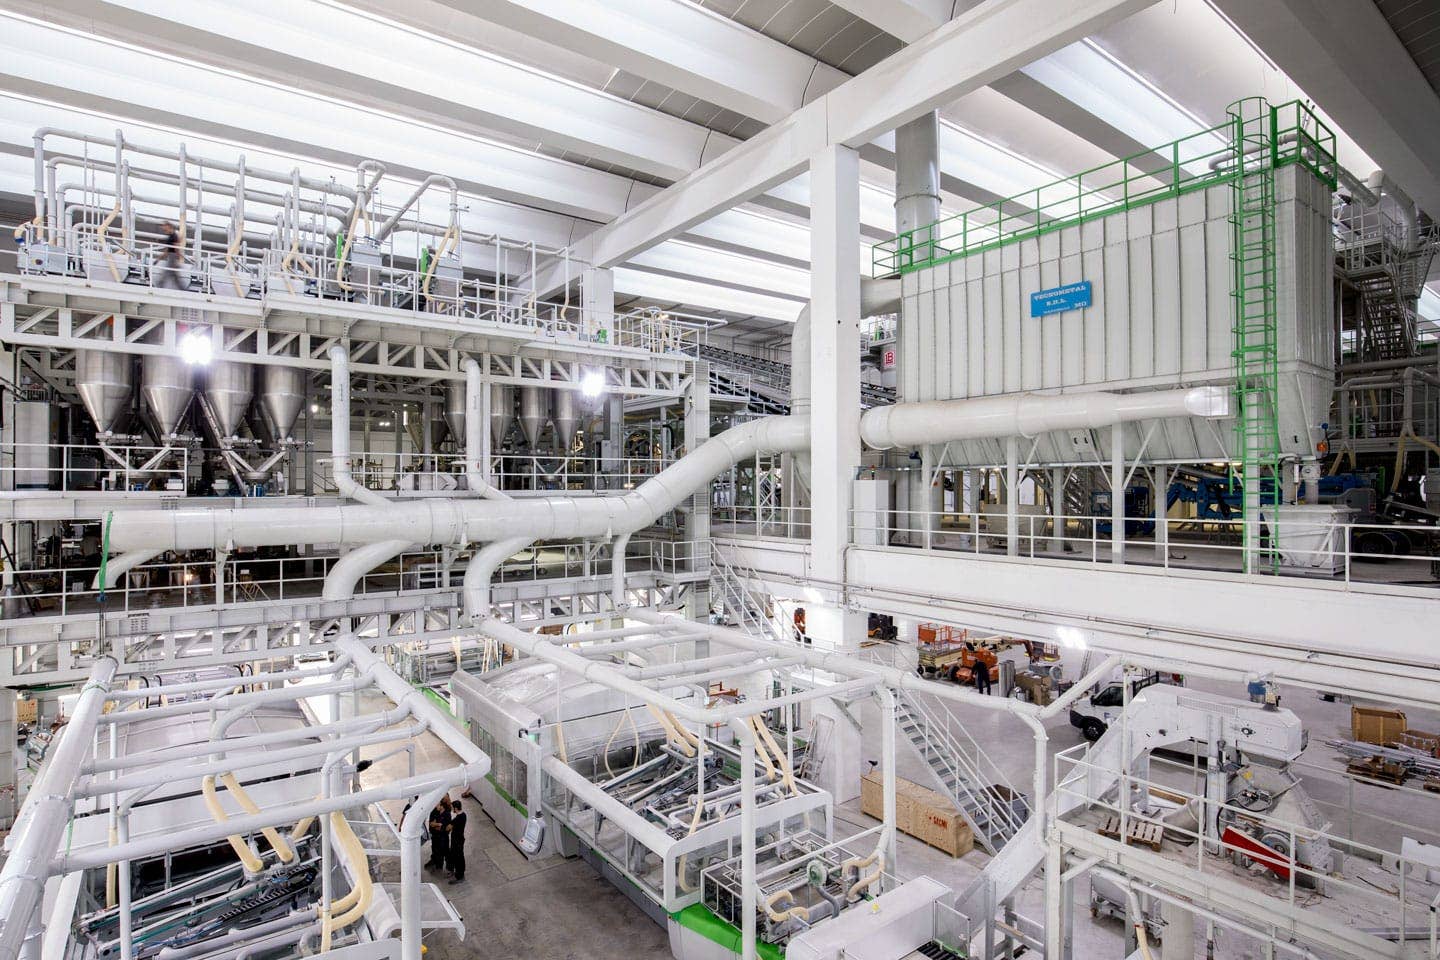
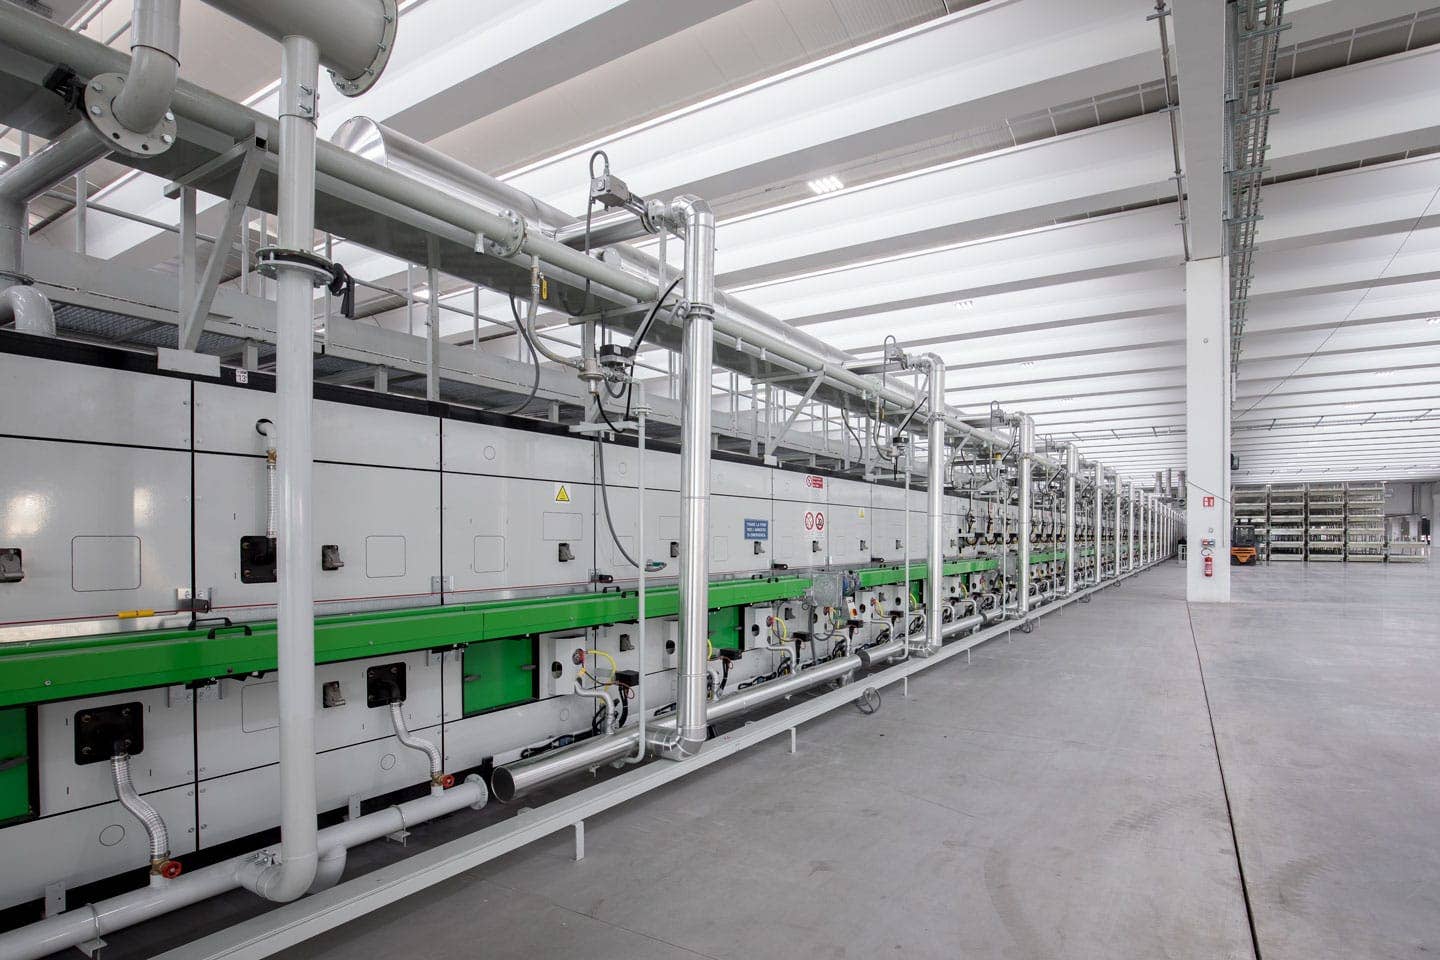
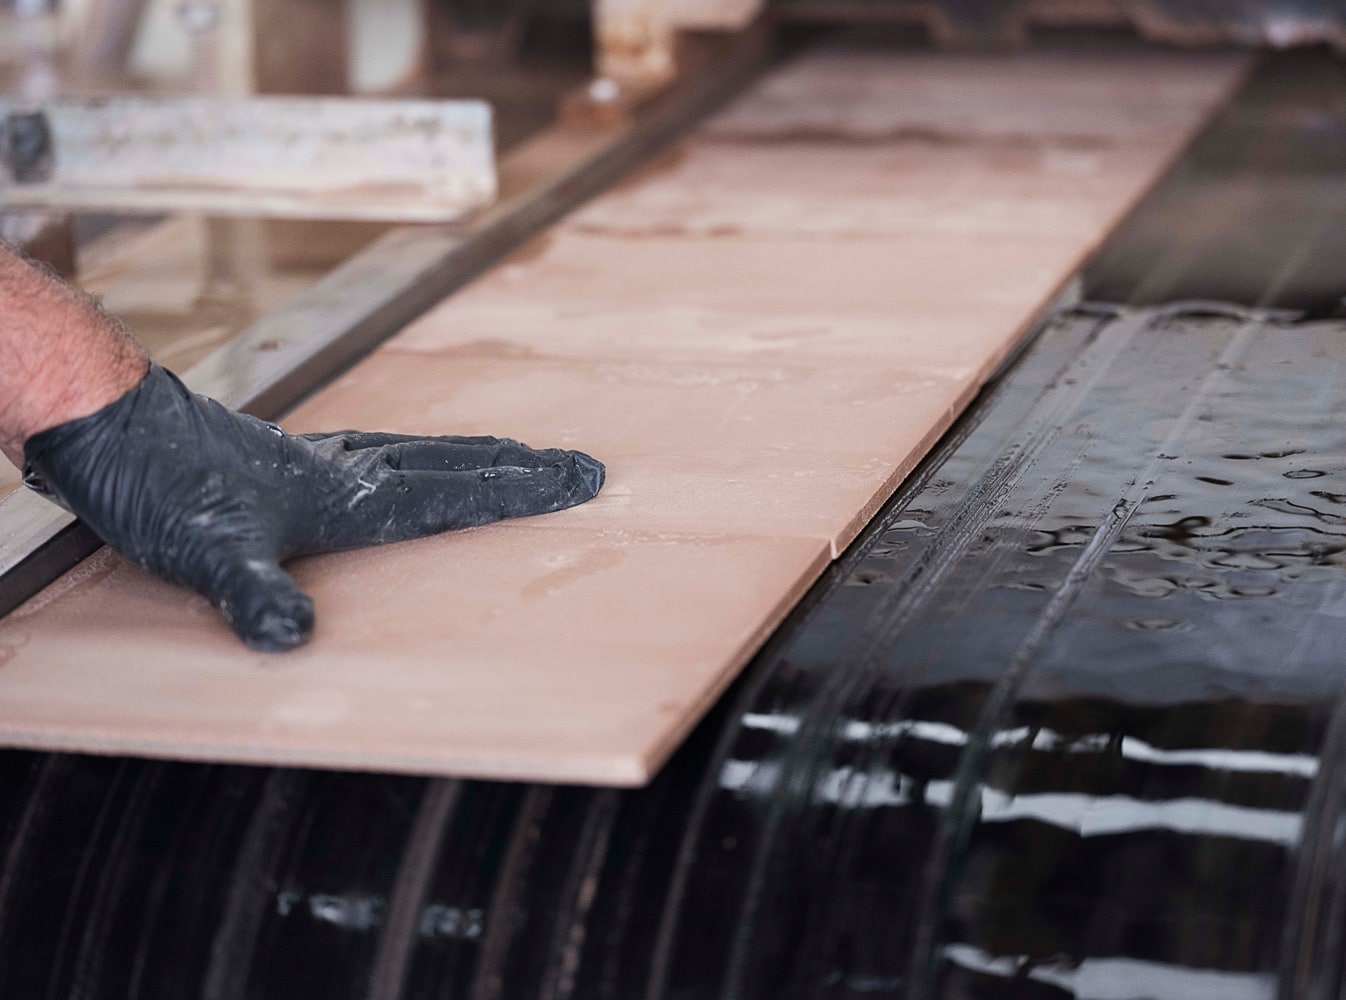
Take a sneak peek into our supplier, Florim's factory to see how tiles are made.
How Pressed Tiles Are Made
The most common method to make tiles is by pressing clay powder into compact tile shapes at very high pressure. Pressing clay powder results in a more dimensionally stable product rather than the alternative methods of slip casting liquid clay or extruding wet clay to make tiles like quarry tiles
While most industrial tile manufacturing still involves pressing clay powder or “clay dust” into metal cavity moulds, new forms of pressing, without a mould on a belt in a continuous layer have enabled the production of tile slabs bigger than 1.2 x 3.6 metres or any size up to that, in any thickness of between 3mm and 30mm. These modern slabs can be used on benchtops, floors and walls as a replacement for natural stone.
Stage 1 Raw Materials
Different types of clay, feldspar and silica are blended together with water to create a liquid clay ‘slurry’. By blending the materials in water, the mixture is homogeneous, which makes the fired tiles more consistent.
A continuous stream of this thick clay liquid is pumped into a spray drier which dries it to a granular form with a moisture content of approximately 7%. This clay powder or “dust is stored in large silos ready to send to the presses.
Stage 2 Pressing
The clay powder for the tile body is loaded into hoppers and fed into a hydraulic press. Each press will produce multiple tiles (depending on the tile size) at a pressure of between 1,000 and 10,000 tonnes Some porcelain tiles have different coloured clays loaded into the hoppers to give a pattern that can run all the way through the tile. Structured surfaces can also be formed in the pressing stage.
Stage 3 Drying & Glazing
Because the tile has been formed at such high pressure, it will hold together and can be dried in a continuous drier. If the tiles being produced are to be glazed, this happens on a conveyor line. If the tile is unglazed porcelain, for example, it is directed to the kiln for firing.
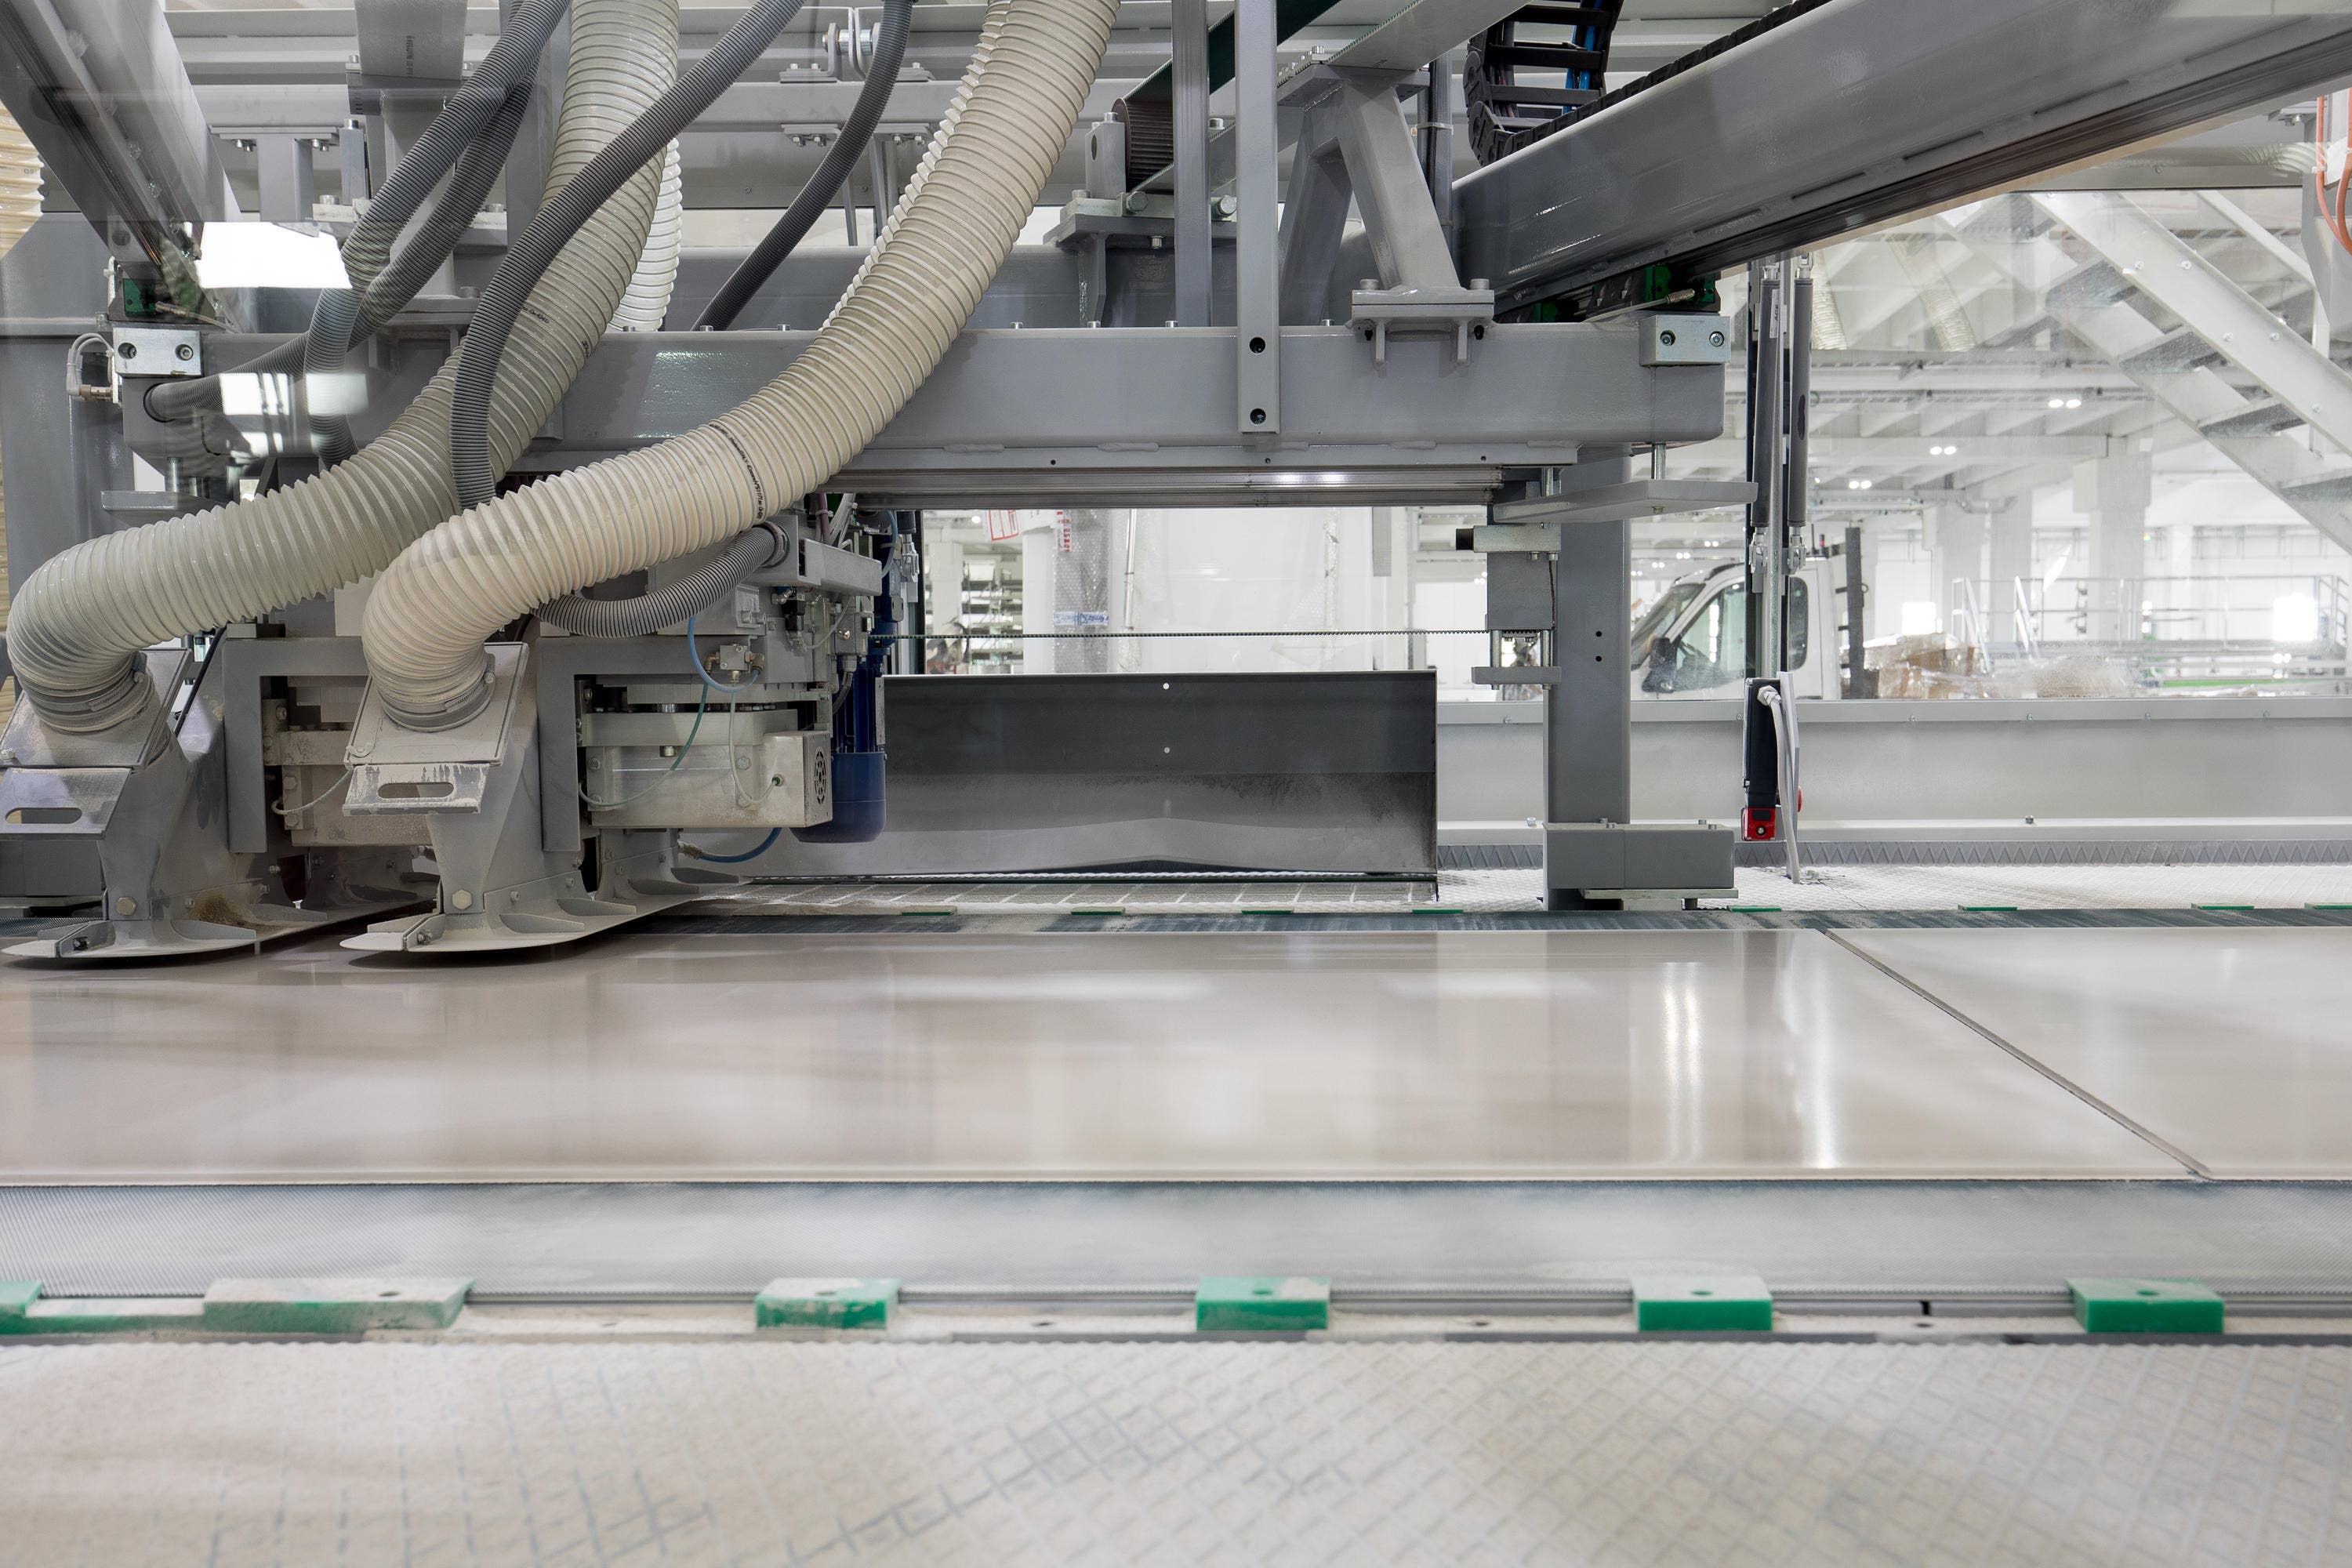
The glazing line deposits a liquid glaze over the tile surface. Many different effects and finishes can be produced on one glazing line. Most categories have at least 2 lines feeding each kiln. More coloured glazes are applied through printing or more commonly now via digital glazing machines. The digital printer deposits various coloured glazes, much like an inkjet printer, which can produce photorealistic decoration effects on the ceramic tile.
Stage 4 Firing
The glazed and dried tiles are fed into a kiln that operates like a giant roller pizza oven. The tiles sit on rotating ceramic rollers that feed them through the kiln in less than one hour, reaching temperatures over 1200 degrees centigrade when it is a porcelain tile (wall tiles are fired at lower temperatures of between 1050 and 1100 degrees. The kilns can be up to 200 metres long, using gas and energy-efficient burners. Many factories use waste heat from the kiln to dry tiles or generate electricity to operate the factory.
Stage 5 Selection & Packing
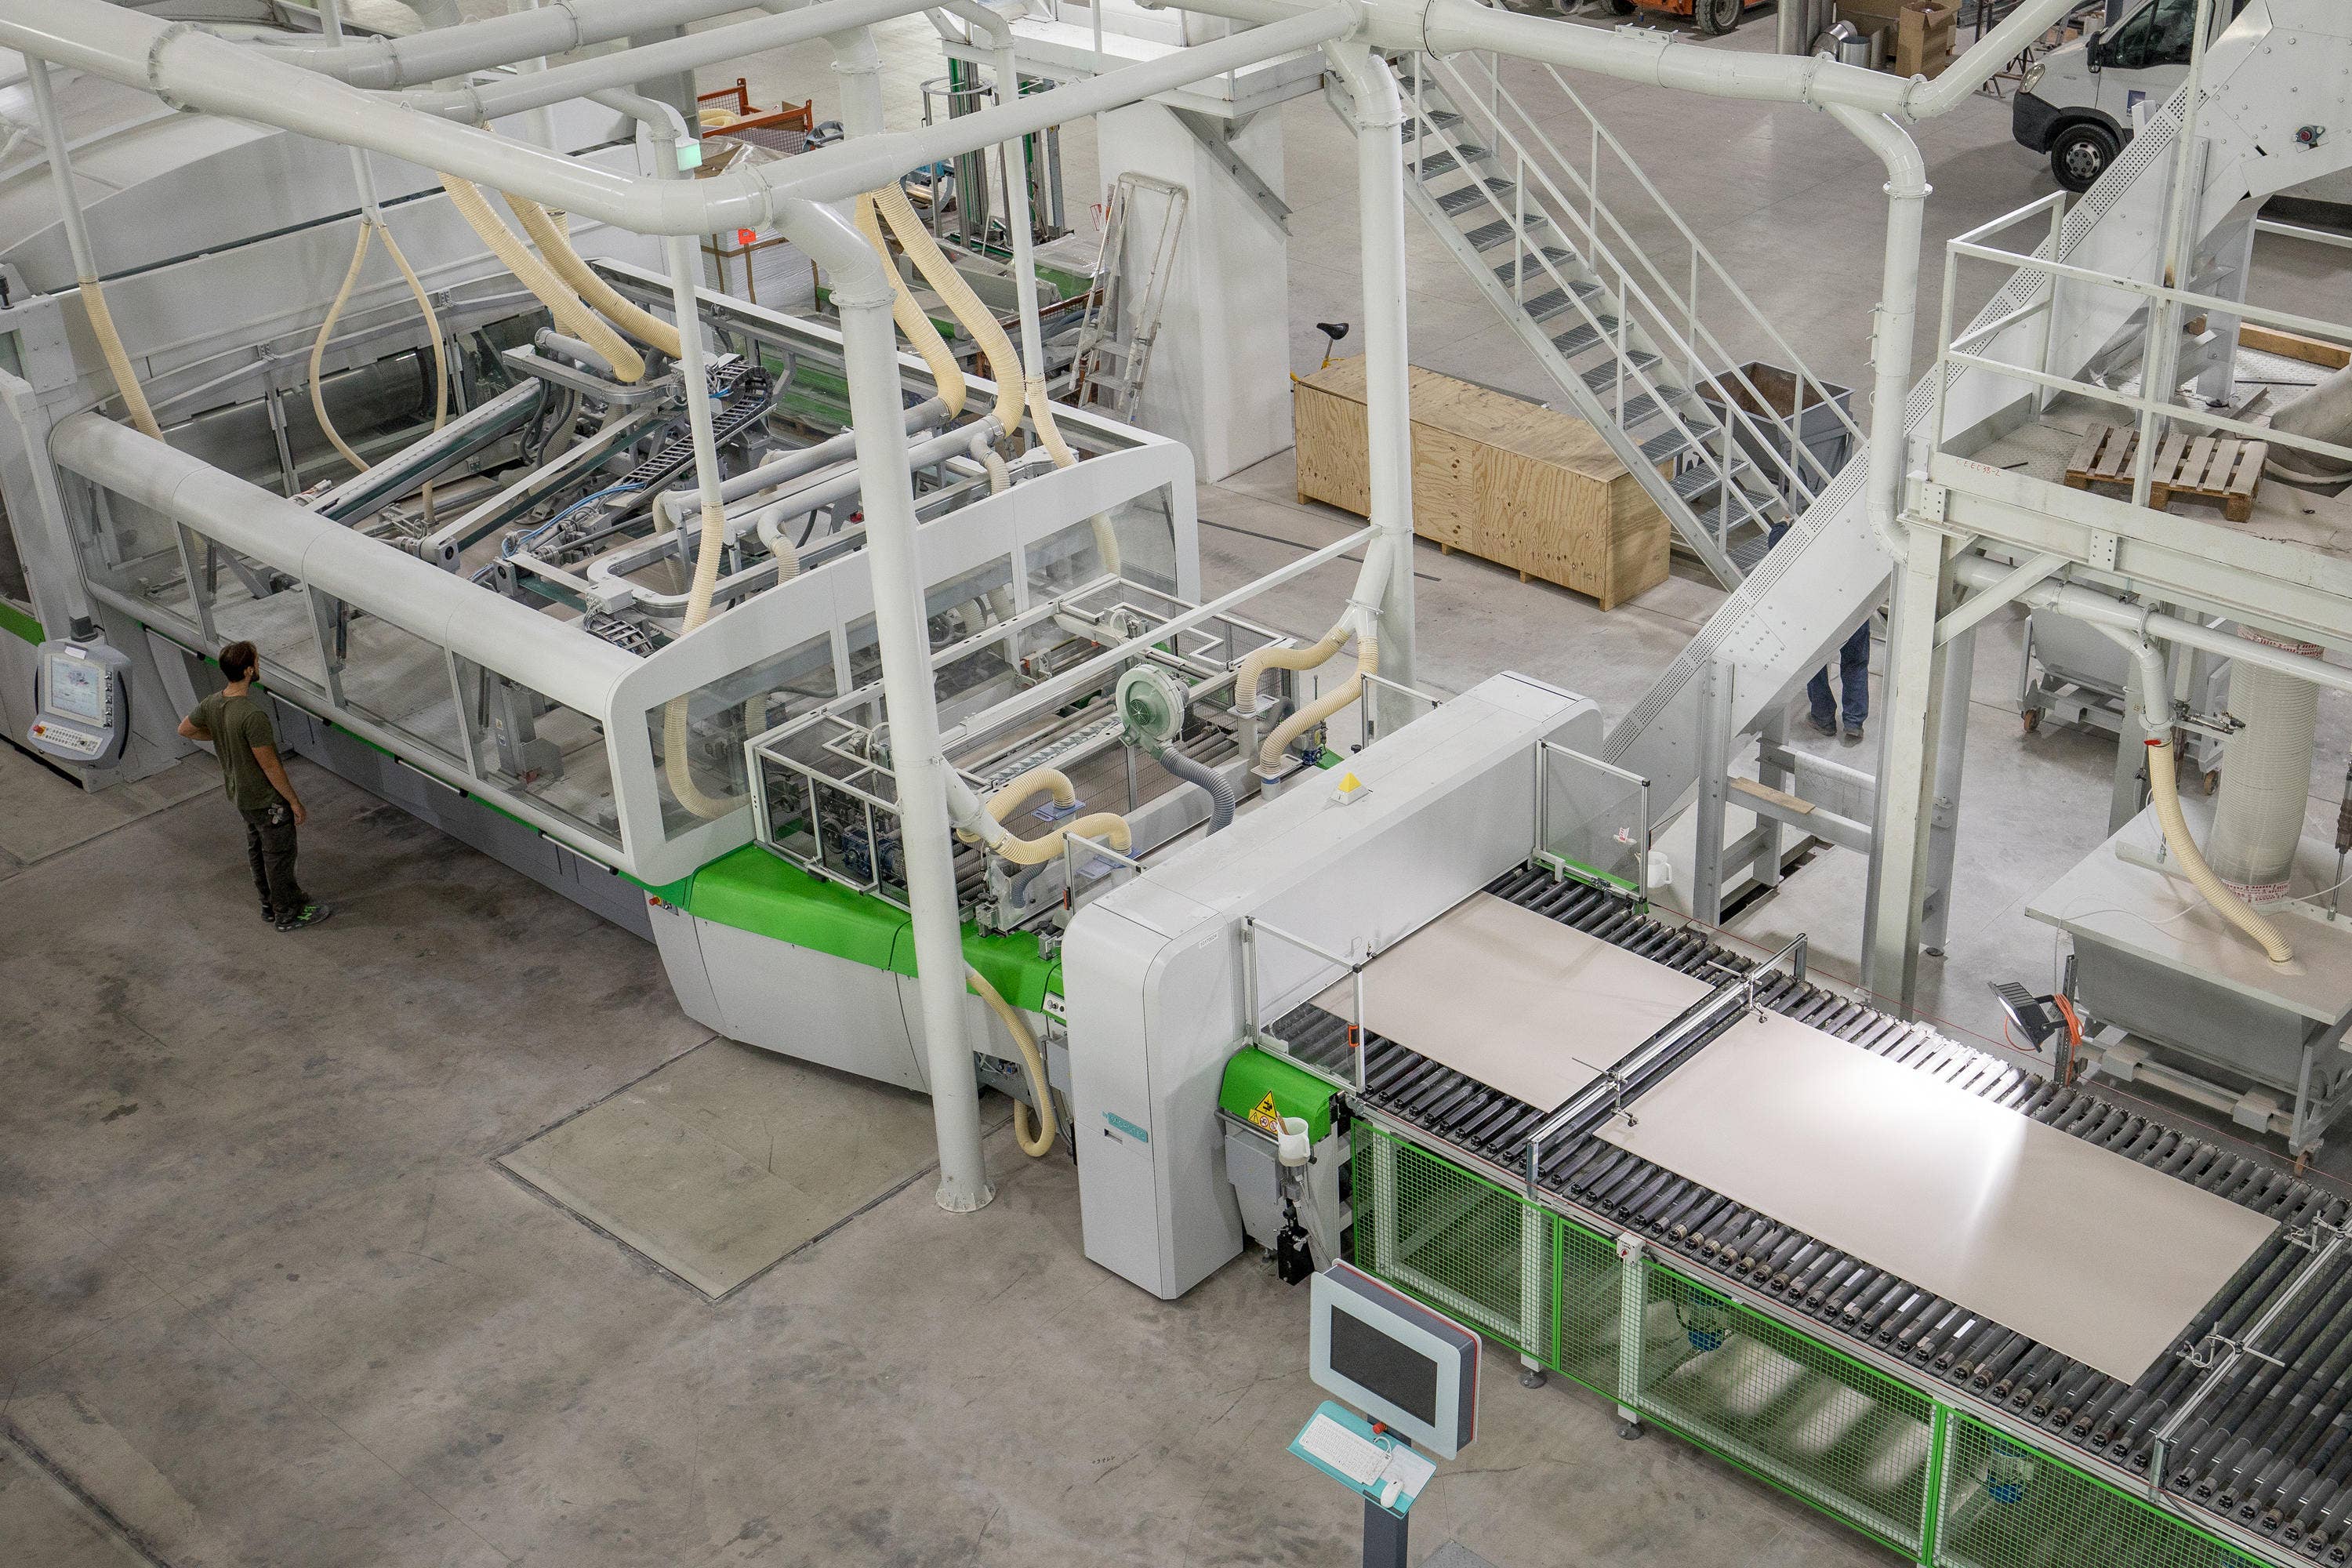
When tiles exit the kiln, they pass under several highly sophisticated testing, sensing and measuring devices to ensure the quality of the finished pieces. They continually check the surface of each tile for defects such as pinholes, edge chips, glaze lumps, stains, cracks, colour consistency as well as conducting dimensional squareness checks. The size or calibration and straightness are checked by laser beams to an accuracy of 0.1mm, also checking that tiles are flat in the corners and centre. After grading by the automatic systems, the information is relayed to the sorting line and packaging unit. Tiles are grouped according to their grade, shade and size and are packed in cartons of matching products.
Stage 6 Polishing & Rectification
Unglazed porcelain tiles are incredibly dense and can be polished using hard grinding stones. The polishing is usually combined with grinding all four edges of the tile to rectify it or make the size consistent, removing even the very minor size fluctuations that are normal in ceramic tiles.
Polished porcelain tiles often have a sealer applied to seal up any micropores in the tile that were opened due to the polishing process.
Well... that was a lot of detail, but it's great to know what goes into our beautiful tiles so you know you are getting the best.
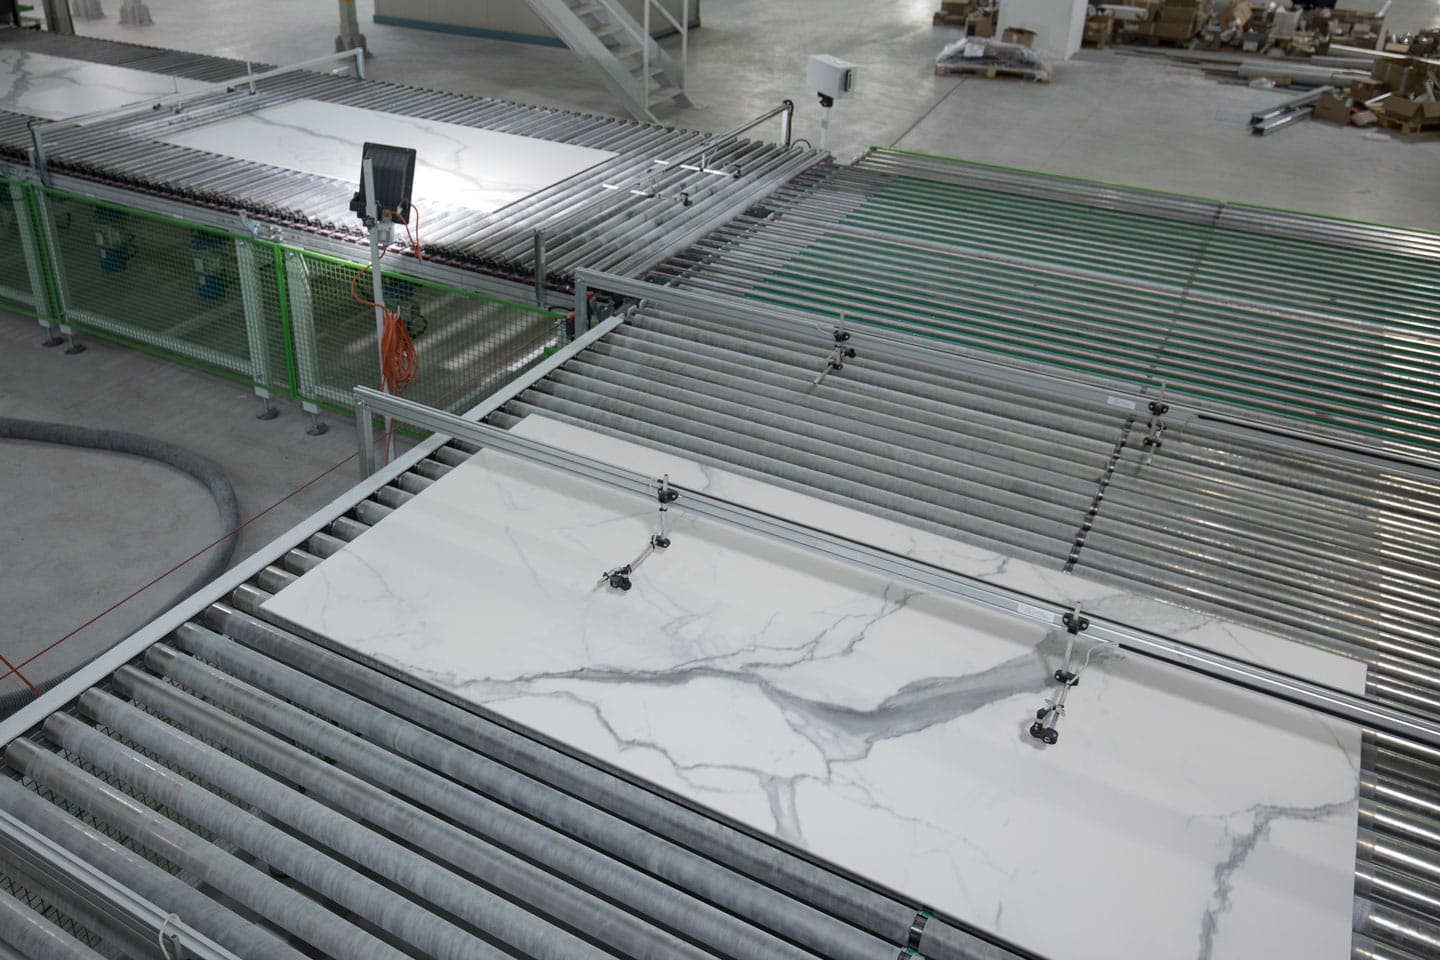
How Slabs Are Made
The most exciting developments in tile making in recent years centre around the production of extra-large slabs. The WOW factor from these tiles speaks for itself, each 3m x 1m tile can look like a piece of art and clever customers of ours have hung some on walls for the ultimate WOW statement in their home.
These slabs are still made from clay powder which is prepared in the same way that is practised for traditional pressed tiles.
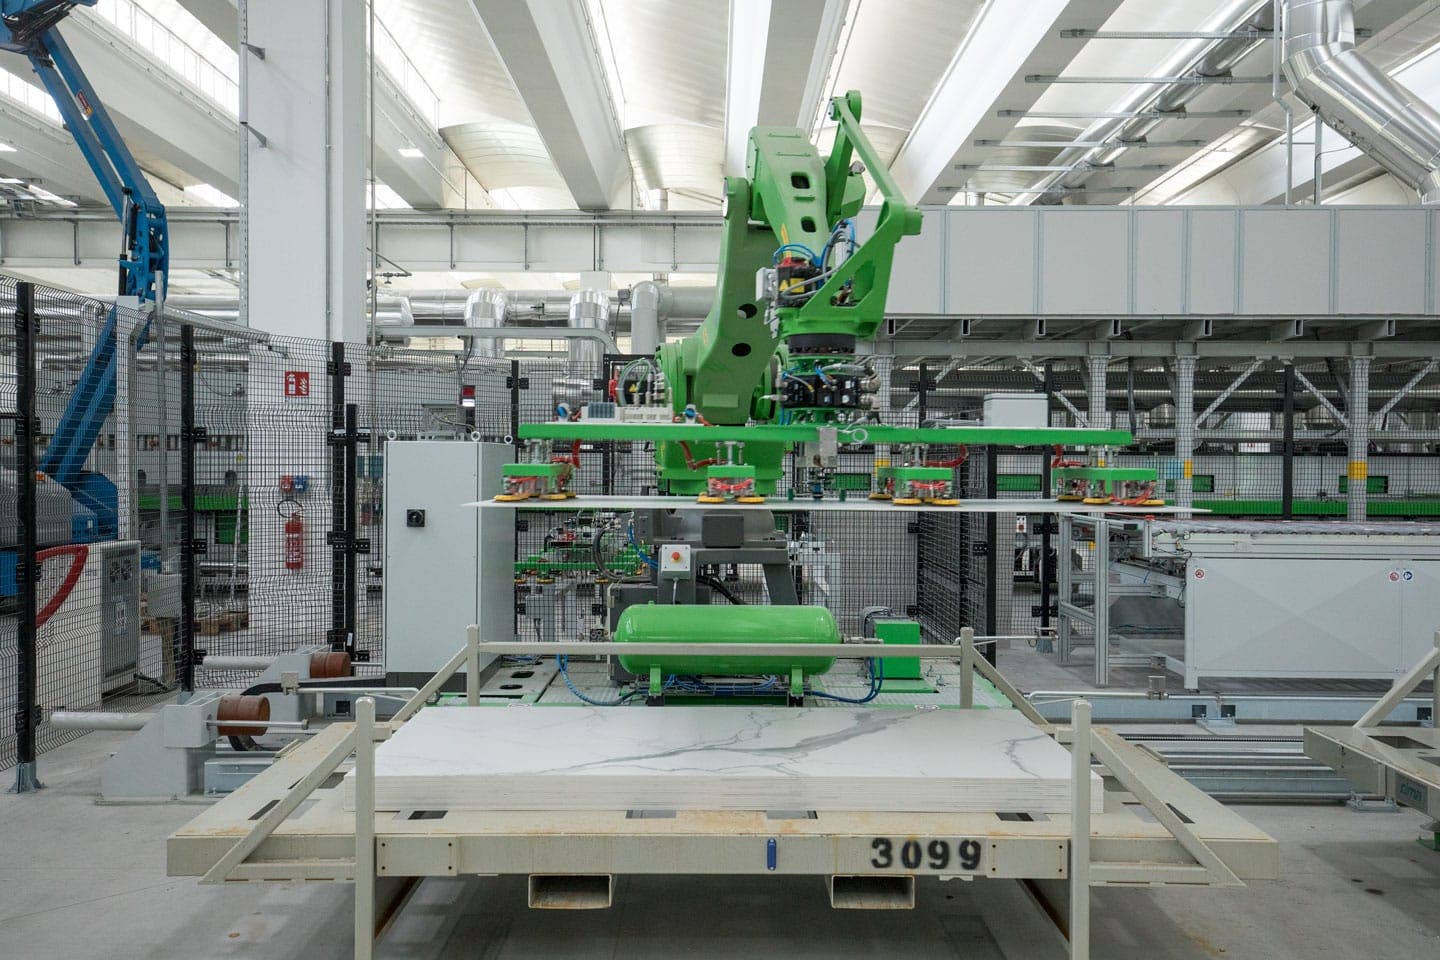
The clay powder is deposited in a uniform thickness on a belt that passes under a belted roller which presses downward an incredibly uniform, high pressure. Some glazes can be added before the pressing stage to create unique surface decorations. The pressed, continuous clay slab is then cut and trimmed to size on the belt, glazed and continues to the kiln. The flexibility of the system means the same production line can produce any size of the same tile. The amount of scrap or waste from cutting is less than 3% and is fully recycled back into the product.
The decoration is largely added via a dry glaze application to the surface combined with digital glazing techniques. Handling of the large slabs is fully automatic via suction cup equipped robots. The kilns to fire these enormous slabs can be either gas or electric powered with the slab transported through the kiln on rotating ceramic rollers.
The world is your oyster if you decide slabs or large format are for you.
Our Hot Tip: Allow us to inspire you with our stunning Slab Collection.
How Extruded Or Pressed Tiles Are Made
Firstly, what’s an Extruded or Pressed tile? Good Question!
Extruded tiles include rustic styles such as terracotta, quarry tiles and clinker. They are also sometimes referred to as split tiles. They are typically used outside or where a rustic effect is wanted and was very popular between 1960 and 1990.
Extruded tiles are often unglazed but a glaze can be added to the surface before firing. Extruded tiles have more size variation than pressed tiles. Extruded or Pressed tiles are formed by wet clay being forced under pressure through a tile shaped nozzle or mould. The continuous column of wet clay is then cut to tile shape before drying and firing. Sometimes the tiles are extruded back to back and are split after firing.
Our Hot Tip: Our experts are armed with a wealth of knowledge. Chat online or head into one of our 110 stores for all the help you need or alternatively, find out everything you need to know about tiles here.
How Natural Stone Tiles Are Made
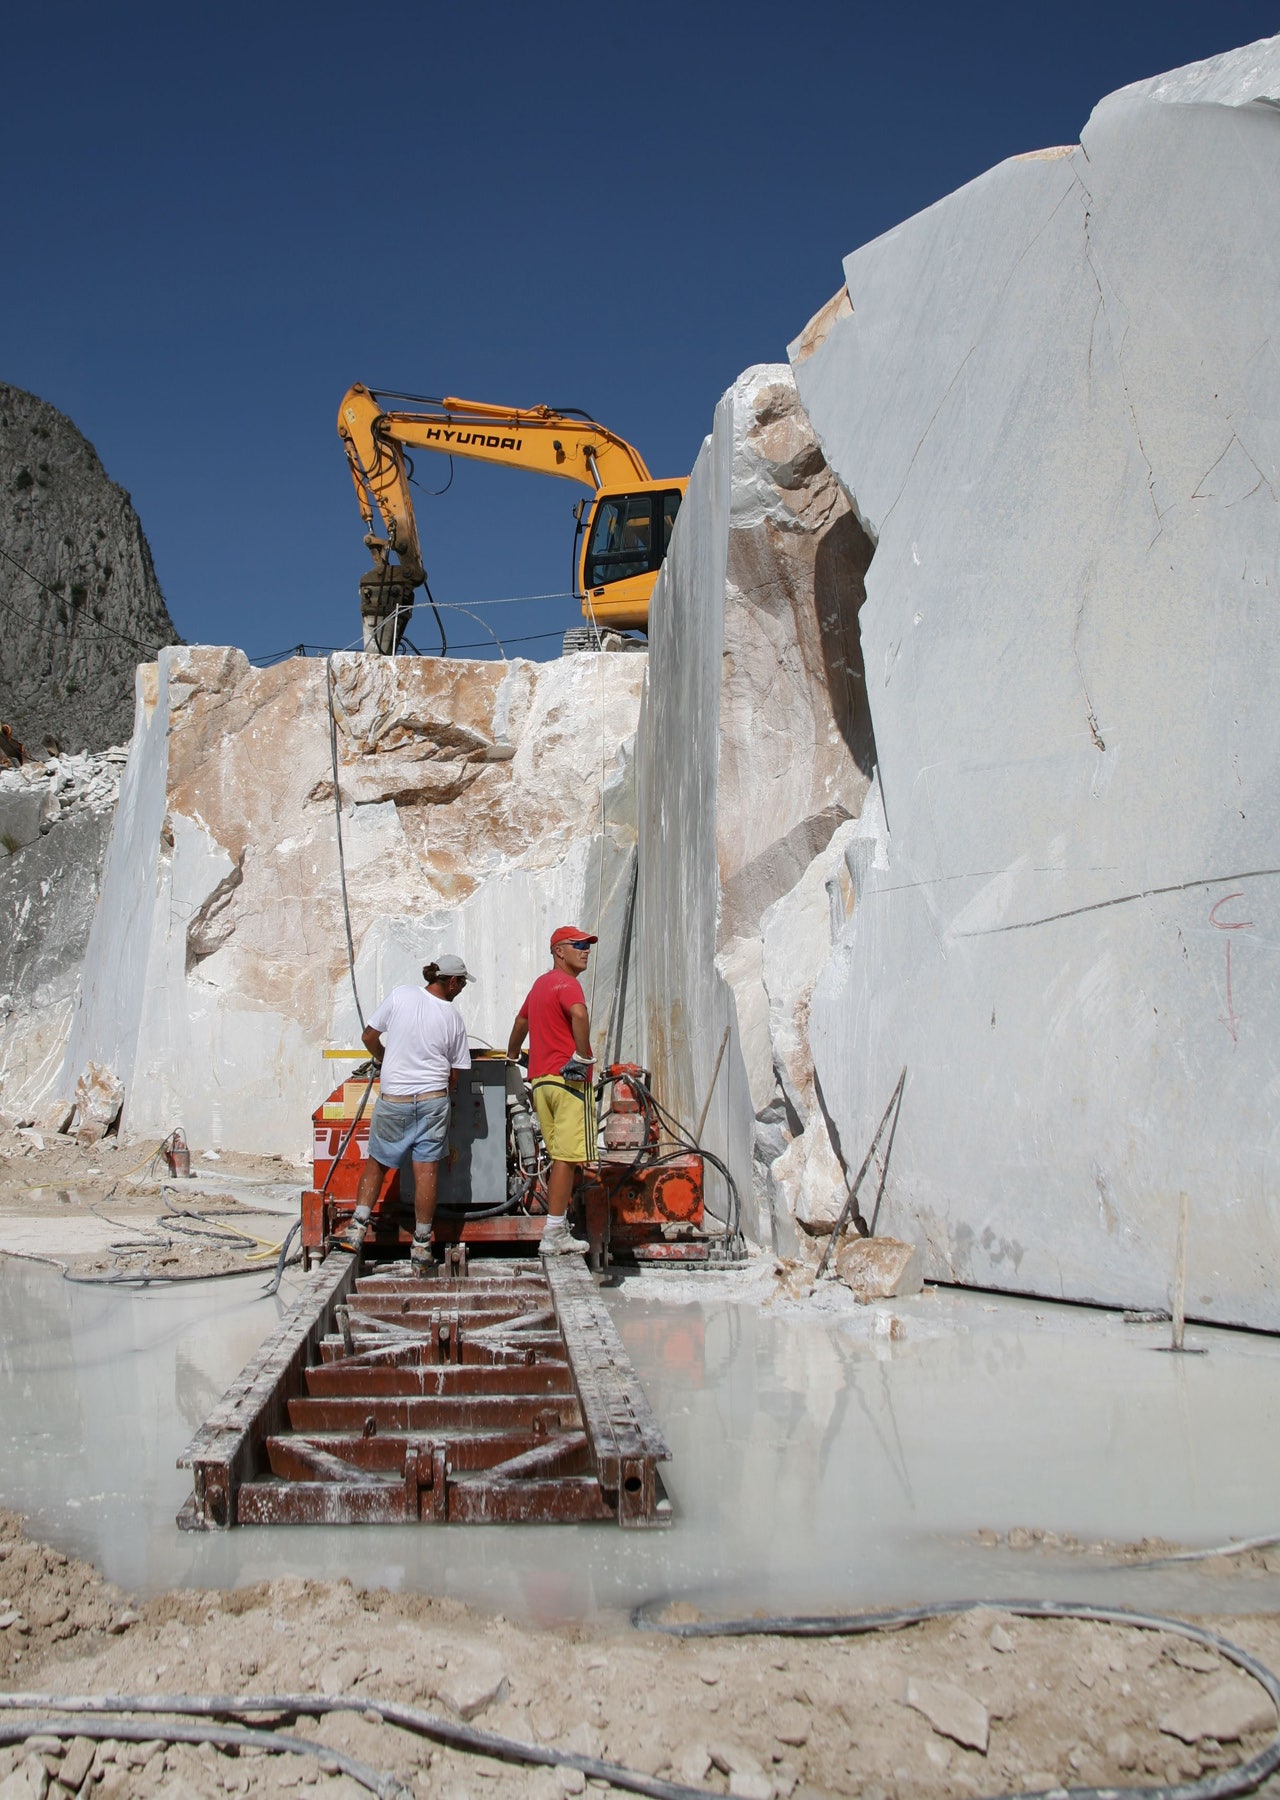
Nature ‘makes’ natural stone of course, below is how we cut natural stone blocks into tiles ready for use in your renovation.
Natural stone tiles are cut from larger blocks of natural stone that are quarried around the world. Usually sourced from areas where the stone is close to the surface, the top surface of the earth is removed and large blocks of marble or natural stone are cut from the ground or side of a hill.
The blocks are either processed nearby or shipped to a stone processing centre, sometimes halfway around the world. The large blocks of stone are sawn or cut with diamond-blade saws into slabs or smaller blocks that can be cut down further into stone tiles.
Some natural stone is weak along veins and fissures in the surface. Stone of this type is typically reinforced by applying epoxy and a mesh to the back to reduce the risk of breakage.
The cut stone is put through a polishing machine and polished to the desired finish - either honed (which is semi-polished) or fully polished. Further processing can include mechanical brushing or tumbling the tiles by placing the tiles in a large vibrating drum with a hard medium to gently knock against the sharp edges.
Natural stone continually varies as it is taken from different depths and different parts of the quarry. No two pieces are generally the same. Stone tiles can be taken from one block or much more likely from various blocks that are then blended.
And without speaking the obvious, as it’s all-natural, variation is a huge part of the look, that’s why you should always dry lay before you install and of course, when deciding that natural is for you, you need to commit to sealing them and then on-going maintenance to keep them looking stunning.
Our Hot Tip: If you decide upon a stunning natural tile, you have to also commit to the on-going care and maintenance to ensure they are always looking amazing.